Every gardener I know finds partially-used seed packets and wonders if these seeds are still good. Ditto with seeds harvested from last year’s garden.
Here’s how you can find out if those seeds are viable and you can expect a plant to emerge, or if they are dead and you shouldn’t waste your efforts putting them in the soil.
Your Goal: See how many seeds germinate, and how quickly, so you can estimate how and when to plant when the time comes.
You’ll Need:
- Seeds you want to test
- Note paper
- Pen
- Clean glass container with lid or a ziplock bag
- Paper towel
- Tweezers
- Distilled water
- Bleach & soap for sanitizing your tweezers
- Heating pad
- Electric timer (optional)
- Thermometer and moisture sensor (optional)
STEP 1: Identify Your Seeds
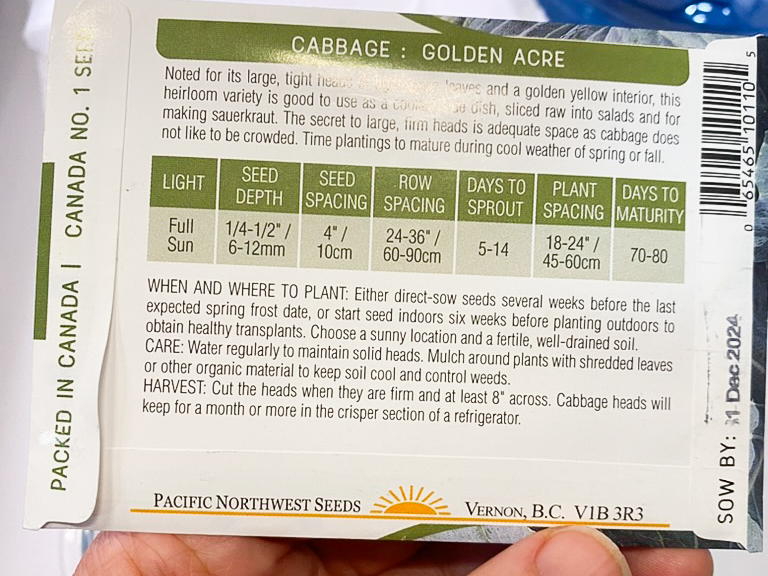
I chose to do a germination test of Golden Acres Cabbage (Brassica oleracea) from Pacific Northwest Seeds purchased at a few unknown dates at some points in the last few years (it all blurs together after a while). You can test several different seed packets at a time, just be sure to have a separate container for each one.
STEP 2: Set Yourself Up For Success
Like most seeds, cabbage is best tested by placing seeds either on top of or between damp paper and exposed to alternating temperatures of 28°C for sixteen hours per day and then dropping to 20˚C for about eight hours overnight. Every seed is slightly different so Smarty Plants like me may wish to do some research, about what’s optimal, or ask their favourite horticulturist.
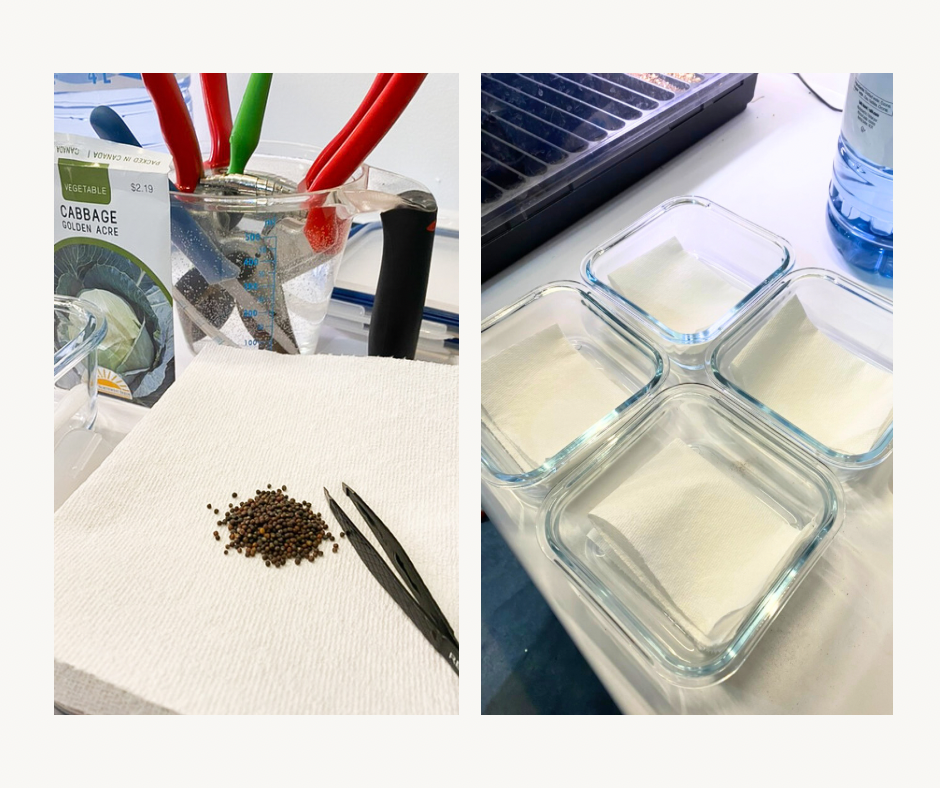
STEP 3: Prepare Your Test Materials
Soak your tweezers in a 10% bleach solution (I use 25 ml of bleach then filled my 250 ml container with tap water). Put a sheet of folded paper towel on the bottom of your container and wet it with distilled water. If you don’t have distilled, use some water from the kettle that has been boiled and then cooled to room temperature.
STEP 4: Place The Seeds
Using the sterilized tweezers, place 10 seeds on the wet paper and put the lid on it without sealing it. Put the temperature and humidity sensor inside the container for monitoring conditions.
STEP 5: Warm It Up and Watch
Place the container on the heating mat, but—this is important—don’t put it directly on the heat. I put my container in a 1020 tray basket and then put the basket on a heating mat. Plug the heat mat into a timer so that you can control temperatures (remember, I wanted approximated 28-30 degrees for sixteen hours per day and then turned the heat pad off so the temperature dropped to 18-20 degrees for eight hours overnight). Do that or just set it on top of the fridge or some other toasty warm place where you can check it regularly.
Monitor the seeds every six to twelve hours (I also recorded the temperature, and relative humidity because, well, Smarty Plants).
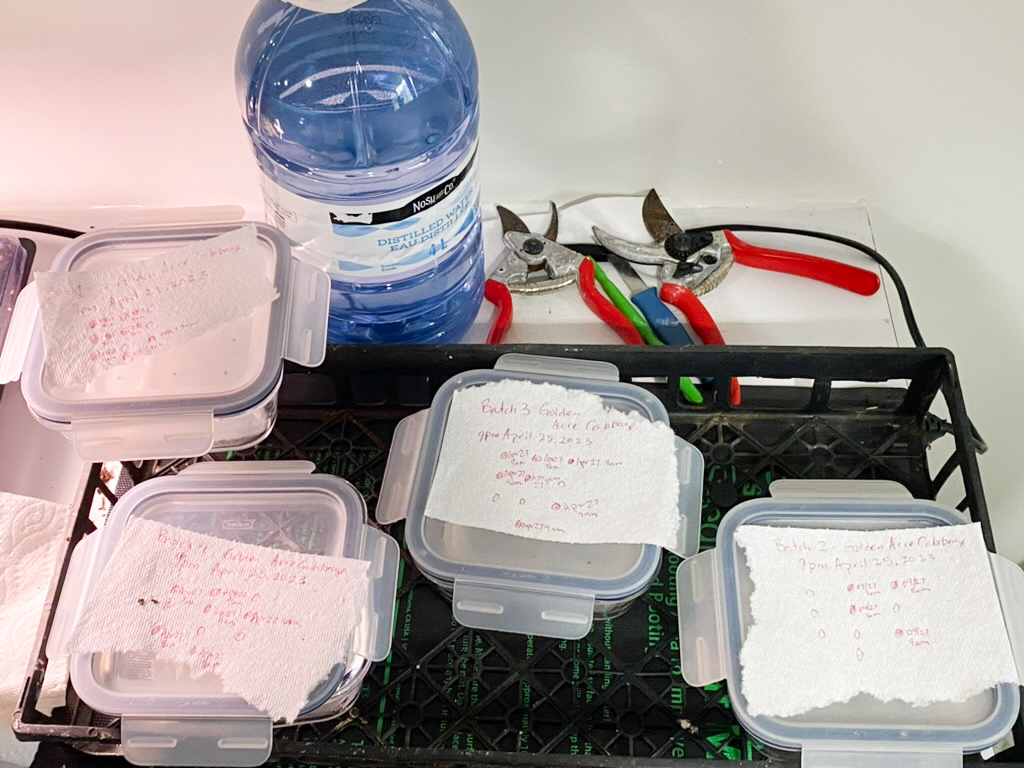
STEP 6: Keep Notes
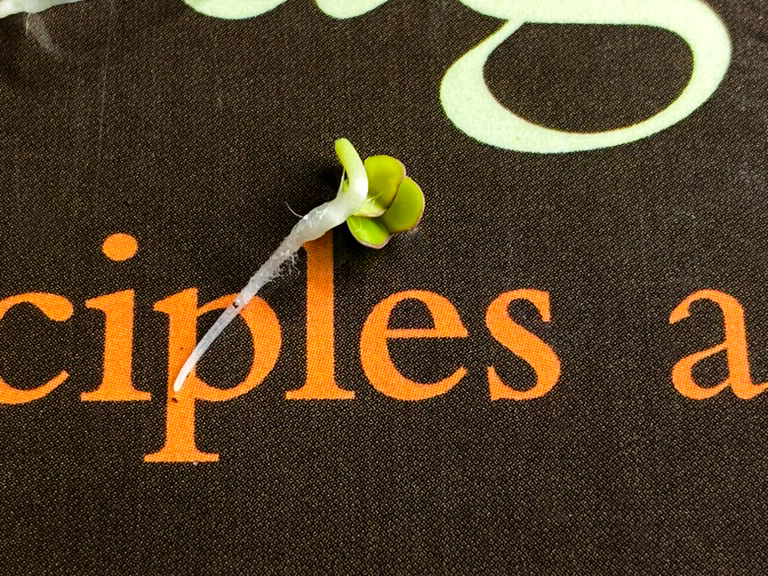
With my seed test, radicles were visible within eighteen hours. And I was pleased to see there was 100% germination (radicle emergence) within thirty-six hours. Ten out of ten seeds germinated. If only two of your seeds germinate, you have 20% germination. If none of your seeds germinate, you either have seeds that aren’t viable or maybe the seeds needed special treatment (poppy seeds, for example, won’t germinate in this way because they need to be cold stratified). Here’s what my results look like.
| Hours Passed | Germination % | RH | Temperature |
| 0 | 0% | 88 | |
| 6 | 0% | 88 | 29.7 |
| 12 | 0% | 88 | 18.8 |
| 18 | 60% | 87 | 28.6 |
| 24 | 90% | 86 | 20.1 |
| 30 | 95% | 88 | 29.4 |
| 36 | 100% | 92 | 19.1 |
STEP 7: Have Fun
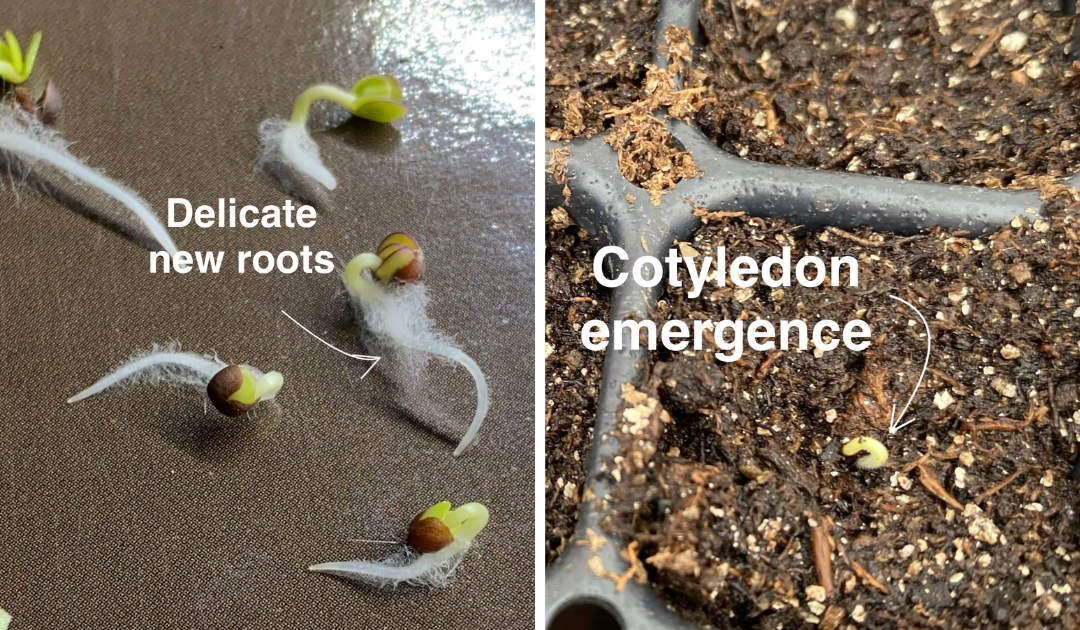
I left the seeds for two more days so that the first green cotyledon leaves emerged. Then my 8 and 9-year old neighbours came over to taste the sprouts and ooh and ahh over the neat little root hairs. All experimenters agreed that they taste a little bit sharp like its relative, mustard.